Tip 1: Hook Viewers in the First Three Seconds
The most common mistake beginners make when filming Instagram videos is ignoring the first three seconds. Instagram’s algorithm punishes slow intros, and users scroll past them before they see anything useful. If you start with a logo animation, a slow pan, or a blank screen, viewers are gone. Instead, open with a visually striking moment — a close-up of the action, a bold text overlay, or a quick motion that grabs attention. For a tutorial video, show the finished result first, then rewind to the beginning. For a travel clip, start with the most dramatic landscape shot. This “hook-first” approach matches how people consume content on mobile: they decide to watch or skip in under a second.
Test your opening by asking a friend to watch the first three seconds without context. If they don’t ask “what happens next?”, re-edit.
Tip 2: Master Lighting Without Expensive Gear
Good lighting is the cheapest way to improve video quality. Natural window light, diffused through a thin curtain, gives a soft, flattering look that works for almost any subject. Position yourself so the light hits your face at a 45-degree angle, not directly from above or behind. If you film at night or indoors, a simple ring light with adjustable color temperature costs under $30 and eliminates harsh shadows. Avoid mixing warm and cool light sources — set your camera’s white balance manually to match the dominant light. For product shots, use a white foam board to bounce light into the shadow side.
The goal is even, soft illumination that makes skin tones look natural and details pop. Harsh overhead ceiling lights are the enemy; turn them off and rely on a single directional source.
Tip 3: Always Film Vertically at 9:16
Instagram videos that fill the entire screen perform better than horizontal clips with black bars. Set your phone or camera to record in 9:16 portrait mode. If you’re using a DSLR or mirrorless camera, rotate the tripod head or use a dedicated L-bracket. For footage shot horizontally, crop it in your editing app to a vertical frame, but be careful not to cut off important elements. Instagram Reels and Stories are designed for full-screen vertical viewing; a horizontal video looks small and unprofessional. Also, keep the main subject in the center of the frame, because Instagram’s interface overlays buttons and text on the edges. Leave a safe margin of about 10% on the top and bottom to avoid clipping by the caption or like button.
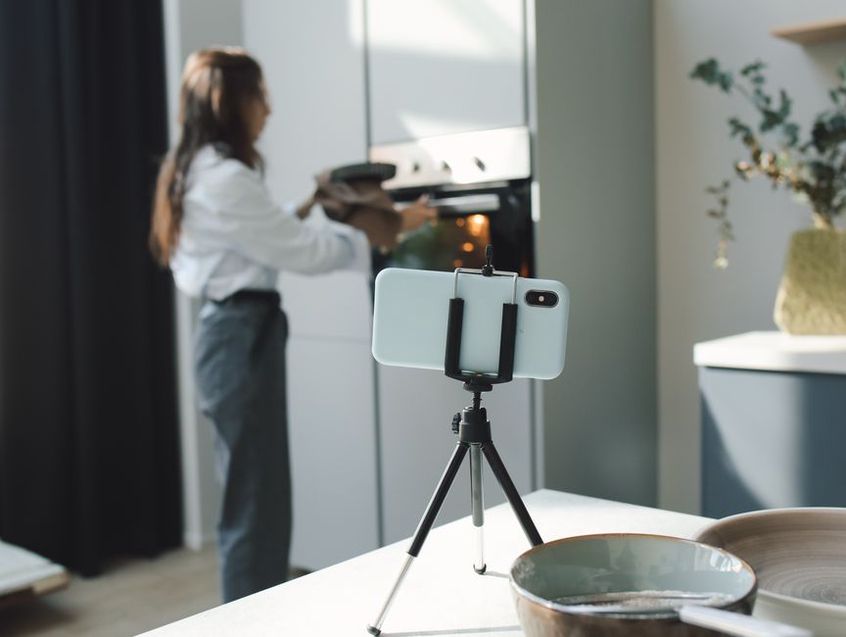
Tip 4: Plan with a Simple Storyboard
Winging it rarely produces a polished Instagram video. Before you hit record, sketch a three- to five-shot storyboard on paper or a notes app. It doesn’t need to be artistic — just list each scene: “1. Close-up of hands mixing dough, 2. Wide shot of oven, 3. Final shot of bread being sliced.” This prevents you from forgetting key steps and reduces editing time. For talking-head videos, write a bullet-point script of the main points, then practice once out loud. A storyboard also helps you plan transitions: a matching action (like a hand wave) between two clips creates a smooth cut. If you’re reviewing the footage later and something feels off, the storyboard tells you exactly which shot to reshoot instead of guessing.
Tip 5: Stabilize Your Camera with a Tripod or Grip
Shaky footage instantly signals amateur quality. Use a tripod, a mini tabletop stand, or even a stack of books to keep the camera still. If you need to move while filming, invest in a gimbal stabilizer for smooth walking shots. For static shots, a remote shutter or voice command avoids the jolt of pressing the record button. Essential gear for stable Instagram videos includes:
- A lightweight tripod with a phone mount (under $20)
- A ring light with an integrated tripod base
- A lens cleaning cloth (dust spots ruin stabilization tracking)
- A small external microphone to avoid wind noise when moving
Even a slight wobble is magnified on a large phone screen. Review each clip in playback before moving on; if you see micro-jitters, reframe and reshoot. Stabilization in post-production (like Warp Stabilizer) can help, but it often crops the image and introduces artifacts. Get it right in-camera first.
Tip 6: Record at 60 Frames Per Second for Smooth Motion
Instagram compresses video heavily, and low frame rates (24 or 30 fps) can look choppy after upload, especially during fast movement. Recording at 60 fps (frames per second) gives you fluid motion that survives compression better. If your phone supports 4K at 60 fps, use that setting; the extra resolution allows you to crop or reframe in editing without losing quality. For slow-motion effects, shoot at 120 fps or higher, then slow it down to 30 fps in your editor — this creates dramatic, smooth slow-mo that catches attention in Reels. Be aware that 60 fps files are larger and require more storage, so delete unused clips promptly. Also, if you plan to post to Instagram Stories, 60 fps videos play back smoother than 30 fps, especially on newer iPhones and Android devices.
Tip 7: Edit with Jump Cuts, Not Transitions
Instagram viewers have short attention spans, so long takes with slow transitions feel boring. Use jump cuts — removing the pauses and filler words between sentences — to keep the pace tight. In your editing app (e.g., CapCut, InShot, or Premiere Rush), split the clip at each natural pause and delete the silence. The result is a fast, energetic video that packs more information into 30 seconds. Avoid overusing flashy transitions like swirls or wipes; they distract from the content. A simple hard cut or a quick zoom-in works better. For tutorial videos, speed up repetitive actions (like stirring or typing) to 2x or 3x speed. Add a subtle sound effect (e.g., a whoosh) on each cut to maintain rhythm. Watch your edit without sound first — if the visual flow is clear, the audio will only enhance it.

Tip 8: Always Add Captions and Text Overlays
Many Instagram users watch videos with sound off, especially in public. Auto-generated captions are available in the app, but they often contain errors and miss speaker emphasis. Manually add captions using a tool like CapCut’s auto-caption feature, then proofread and adjust timing. Place captions in the lower third of the screen, leaving the center clear for the subject. For key points, use bold text overlays that appear on screen for a few seconds — this reinforces the message and improves retention. Keep text short: two to four words per line. Use a sans-serif font with high contrast (white text with a black shadow or background box). Also, add a colored highlight behind text to ensure readability over changing backgrounds. Captions also help with search: Instagram indexes caption text, so including relevant keywords in your on-screen text can improve discoverability.
Tip 9: Optimize the Thumbnail and First Frame
Your video’s first frame acts as the thumbnail in the feed, even if you don’t set a custom cover. Choose a frame that is visually compelling — a bright, well-composed shot with a clear subject. Avoid frames with motion blur, closed eyes, or empty space. In your editing app, export a still from the best moment and upload it as the custom cover image. Add a short text overlay on the cover (e.g., “5-Minute Recipe” or “Fix This Error”) to give context. The cover image should be 9:16 and at least 1080×1920 pixels. For example, if you film a cooking video, the first frame should show the final dish or a key ingredient being chopped — that single frame can double your tap-through rate. Test two different covers for the same video and compare which gets more views in the first hour.