
A six-foot tomato plant can shade a row of lettuce for much of the day. Before you buy seeds or build beds, watch how sunlight moves across your yard or balcony. It is an easy way to avoid a frustrating first-season mistake: planting vegetables where they cannot get enough light.
Work through these steps in order. You do not need every upgrade before planting, but you do need a usable spot, suitable soil, a way to water, and enough room for your crops.
1. Choose a small site you can reach easily
- Check direct sun. Most fruiting vegetables, including tomatoes, peppers, beans, and squash, do best with at least six hours of direct sunlight; eight is better for many. Leafy greens can often produce with less, particularly in hot weather, though they may grow more slowly.
- Check water access. A nearby tap or a practical route for a hose or watering can matters more than a picturesque corner at the far end of the property.
- Check drainage. Avoid spots that stay waterlogged after rain. If water pools regularly, consider a raised bed or containers instead of planting directly in the ground.
- Check permissions and safety. Confirm the rules for shared spaces, balconies, or rented property. Do not put heavy containers where structural load limits are uncertain, and do not dig until you know where buried utilities run.
Start with one area you can manage: perhaps a bed roughly 4 feet by 4 feet, two or three large containers, or a short in-ground row. A bed no wider than about 4 feet lets most people reach the middle from either side without stepping on the soil. You can expand next season, once you know how much time watering, weeding, and harvesting take.
2. Decide between ground, raised bed, and containers
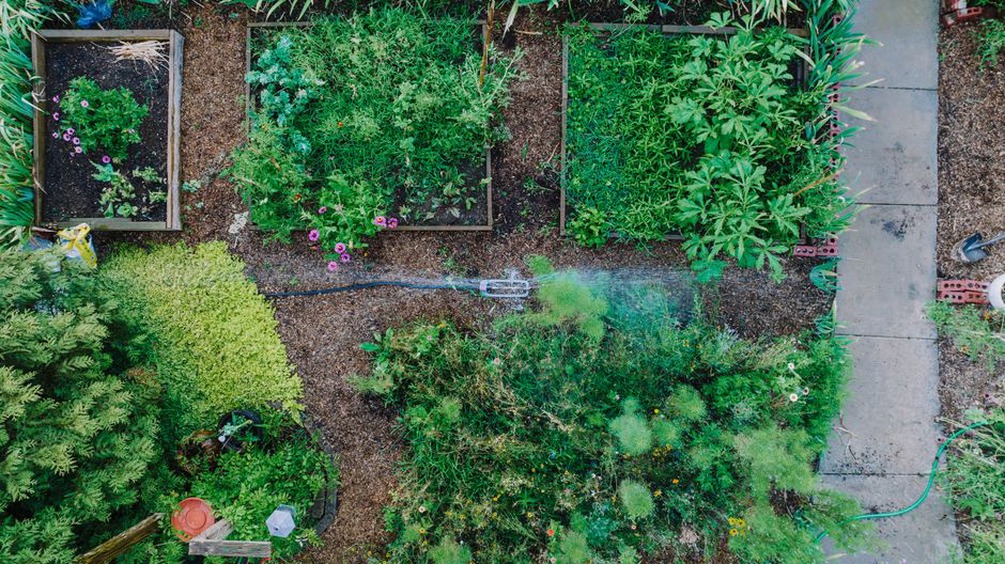
In-ground planting uses existing soil and usually costs the least, provided it drains well and is suitable for growing food. Raised beds give you more control over the growing mix and can help where native soil is compacted or poorly drained, but you need materials and soil to fill them. Containers work well on patios and balconies and can be moved to a better spot; their limited soil volume means they dry out faster.
Choose containers with drainage holes and room for mature roots. Lettuce can grow in a relatively shallow planter, while a full-size tomato usually needs a large, sturdy container—often around 5 gallons or more, depending on the variety and local heat. Check the mature plant size on the seed packet or label rather than assuming everything will fit in a window box. If you use a saucer, empty any standing water and protect surfaces that runoff could damage.
3. Find out what your soil needs
For an in-ground bed
Remove turf and perennial weeds, taking out as much of their roots as you can. Loosen compacted soil, but wait if it is soggy: digging wet soil that squeezes into dense clumps can damage its structure. A soil test is the most reliable guide to pH and nutrients. If testing is available locally, ask for vegetable-growing recommendations and follow the test provider's sampling instructions.
Mix finished compost into the upper growing layer to improve structure and add organic matter. Compost helps, but its nutrient levels vary, so it does not replace a soil test or a plan for fertility. Apply fertilizer according to its label and any soil-test recommendation. Extra fertilizer can damage plants and increase runoff instead of improving the harvest.
For a raised bed or container
Use a mix suited to the setup. Containers need potting mix that holds moisture without becoming compacted; plain garden soil often packs too tightly in pots. For a raised bed, choose a raised-bed mix or a blend of appropriate topsoil and finished compost. Leave a little room below the rim for watering and mulch. Rocks at the bottom of a container are no substitute for drainage holes.
Near an older building, a busy road, or former industrial activity, consider testing native soil for contaminants before growing food in it. A raised bed filled with clean growing material, a barrier that limits contact with underlying soil, and clean paths can reduce exposure, though the design should reflect the site's specific risks. Wash harvested produce and keep loose soil off leaves and hands.
4. Choose crops for your season, space, and appetite
Find your area's typical last spring frost and first autumn frost dates. These are planning averages, not guarantees. Compare each crop's temperature needs and days to maturity with the time you have. Peas, radishes, spinach, and many lettuces tolerate cooler conditions; tomatoes, cucumbers, and beans need warmer soil and protection from frost. Timing depends on climate. In very hot regions, autumn may be a better season than midsummer for some greens.
Pick vegetables you eat regularly, then keep the first planting to a few types. One compact tomato, a short row of bush beans, and a container of leaf lettuce would give you different harvests without taking up a large plot. If the site gets only modest sun, favor leafy crops over tomatoes and expect a smaller harvest.
- Check the growth habit. Bush beans stay fairly compact; pole beans need support. Indeterminate tomatoes keep growing and need a substantial cage or stake.
- Check mature spacing. A tiny seedling gives you no sense of its final footprint. Crowding restricts airflow and makes watering and harvesting harder.
- Read days to maturity carefully. The number is an estimate, often counted from sowing for direct-seeded crops and from transplanting for plants sold as starts. Weather can change the actual date.
- Match the variety to the space. Compact or patio varieties can suit containers, but check their recommended pot size and support needs.
5. Make a simple planting map
Sketch the bed or container layout with rough dimensions. Mark each crop at its mature spacing, not its seed size. Put tall plants and supports where they will shade smaller crops least. In much of the Northern Hemisphere, the north side of a bed is a useful starting point, though walls and the sun's path may change the best position. Leave yourself room to reach every plant without walking on the growing soil.
Plan a second planting only if you have time to care for it. Radishes or leaf lettuce may be harvested early enough to free up space, but the next sowing still has to suit the season's temperatures. Note sowing dates on your map so you can tell whether a bare patch is waiting for seeds to sprout or ready for something new.

6. Gather only the equipment you need
You do not need a shed full of tools. Get the essentials ready before sowing, then buy anything else when you have a reason to use it.
- For soil preparation: a hand trowel for small beds or containers, plus a garden fork or spade if you are preparing ground.
- For watering: a watering can with a gentle rose or a hose nozzle that will not wash seeds away. A timer or drip line may help later but is not essential.
- For care: gloves if you want them, a small weeding tool, and clean pruners for harvesting or removing damaged growth.
- For planting: seeds or healthy transplants, labels, and any cages, stakes, or trellises your varieties require.
- For soil coverage: clean mulch, such as straw or shredded leaves, applied after the soil has warmed where appropriate.
Set up sturdy supports before plants sprawl. Forcing a cage around a mature tomato can break stems and disturb roots. Clean old soil and plant debris from reused pots and tools, especially if the previous crop was diseased.
7. Plant at the right time and depth
Seeds
Check the packet for sowing depth, spacing, temperature, and whether the crop prefers direct sowing. Beans, peas, and root crops such as carrots are commonly sown where they will grow. Sow into moist soil, cover seeds to the specified depth, and water gently. Keep the seed zone consistently moist until seedlings emerge; a dry surface crust can prevent germination. Once the seedlings are growing, thin them to the recommended spacing rather than leaving a crowded cluster.
Transplants
Buying starts can make timing easier for crops such as tomatoes and peppers. Look for stocky plants with healthy leaves, no visible insects, and no damaged roots pushing out of the pot. Plants raised indoors or under shelter need hardening off: gradually expose them to outdoor light, wind, and temperatures over several days, bringing them under cover if conditions turn harsh. This helps reduce transplant shock.
Set most transplants at about the depth they grew in their pots, gently firm the soil around the roots, and water them in. Tomatoes are a common exception: buried stems can form additional roots, provided the foliage left aboveground stays healthy. If a late frost is forecast, protect warm-season plants or wait to plant them.
8. Set a watering and mulching routine
Check below the surface before watering. A bed may look dry on top while the soil an inch or two down is still moist. When it does need water, soak the root zone rather than giving the surface a quick spray. Deep watering encourages roots to grow farther into the soil. Check containers more often, especially in wind or heat; water until excess drains out, then do not leave the pot sitting in water.
About an inch of water per week from rain and irrigation combined is a rough benchmark for established garden beds, not a fixed rule. Temperature, soil, crop size, and growth stage all affect how much water plants need. Newly sown seeds need gentler, more frequent moisture near the surface, while developing fruiting crops may need particularly consistent watering. Aim at the soil rather than routinely wetting the leaves, and water early enough for any wet foliage to dry.
Once seedlings are established, spread a modest layer of clean organic mulch around them, leaving space around the stems. Mulch slows evaporation, suppresses some weeds, and reduces soil splashing onto leaves. Keep it off small seedlings.
9. Inspect briefly and often
A five-minute look several times a week is more useful than waiting for a problem to become obvious. Check under leaves for insects and eggs, notice yellowing or spots, pull small weeds before they seed, and make sure ties and supports are not cutting into stems. Not every insect is a pest, and a few chewed leaves do not automatically call for treatment.
If a plant looks unwell, check soil moisture, drainage, and recent temperature changes before reaching for a spray. Notice whether symptoms appear on old leaves, new leaves, or the whole plant, then identify the likely cause before acting. Remove badly diseased material when appropriate and clean tools between affected plants. If you choose a product approved for edible crops, follow its label exactly, including directions about keeping children and pets away.
Harvest when crops are ready. Picking beans and many leafy greens at the right stage keeps them tender and, for some crops, encourages more growth. Jot down the date and what you picked; those notes will help you decide which varieties earned their space.
10. Keep a one-page garden record
Record the crop and variety, where and when you sowed or transplanted it, its first harvest, and any notable problems. Add what you would change next time, such as moving a tall plant or choosing a larger pot. This is handy when a seed packet disappears or two similar-looking seedlings come up together.
Start by labeling each planting as soon as it goes in. A tag reading “bush beans — sown May 18” will tell you what to expect in that row well before the leaves are easy to recognize.